
How to Create Expandable Sections in Squarespace (Show/Hide Sections)

Want to magically show and hide sections on your Squarespace* website? This super cool plugin from SQS Mods allows you to do just that!
With the Expand 2.0 plugin*, you can easily create collapsible sections on your Squarespace website, adding a fun, dynamic element to your site.
Whether you want to declutter your pages or simply create an interactive user experience, this feature gives your website visitors the ability to dive deeper into specific content while keeping your website pages clean and organized looking.
This plugin is popular for team pages where you might want to allow users to easily toggle to expand and collapse team bios. Or you might want to nest hidden content and allow users to click to reveal more.
In this step-by-step guide, I’ll show you how to easily add the Expand 2.0 plugin to your Squarespace website and create hidden expandable sections that will surely impress your website visitors and create an enjoyable user experience.
*This post contains affiliate links. I earn a small commission when you click on the links and make a purchase. This comes at no additional cost to you. Affiliate links are marked with an asterisk.
↓ Squarespace Collapsible/Expandable Sections ↓
1. Purchase the Plugin* from SQS Mods
Purchase the Expand 2.0* plugin directly from SQS Mods — $40
2. Create Your Website Page + Sections
Create the website page including all of the sections you want to show/hide. There are no specific instructions or limitations to creating this page. You can add whatever content or sections you’d like to your page.
Example: If you’re creating a team page with hidden bios for each team member, I recommend creating a team gallery with “Read Bio” buttons for each person. Then, underneath the team gallery, create an individual section for each team member with their bio. Just stack the sections on top of each other for now and then we will add the functionality for hiding/showing in the next steps. See example page below:

3. Find the Section ID’s
Next, you’ll want to find the ID’s for the sections you want to hide/reveal
To easily find these, I recommend using the free Google Chrome extension Squarespace ID Finder
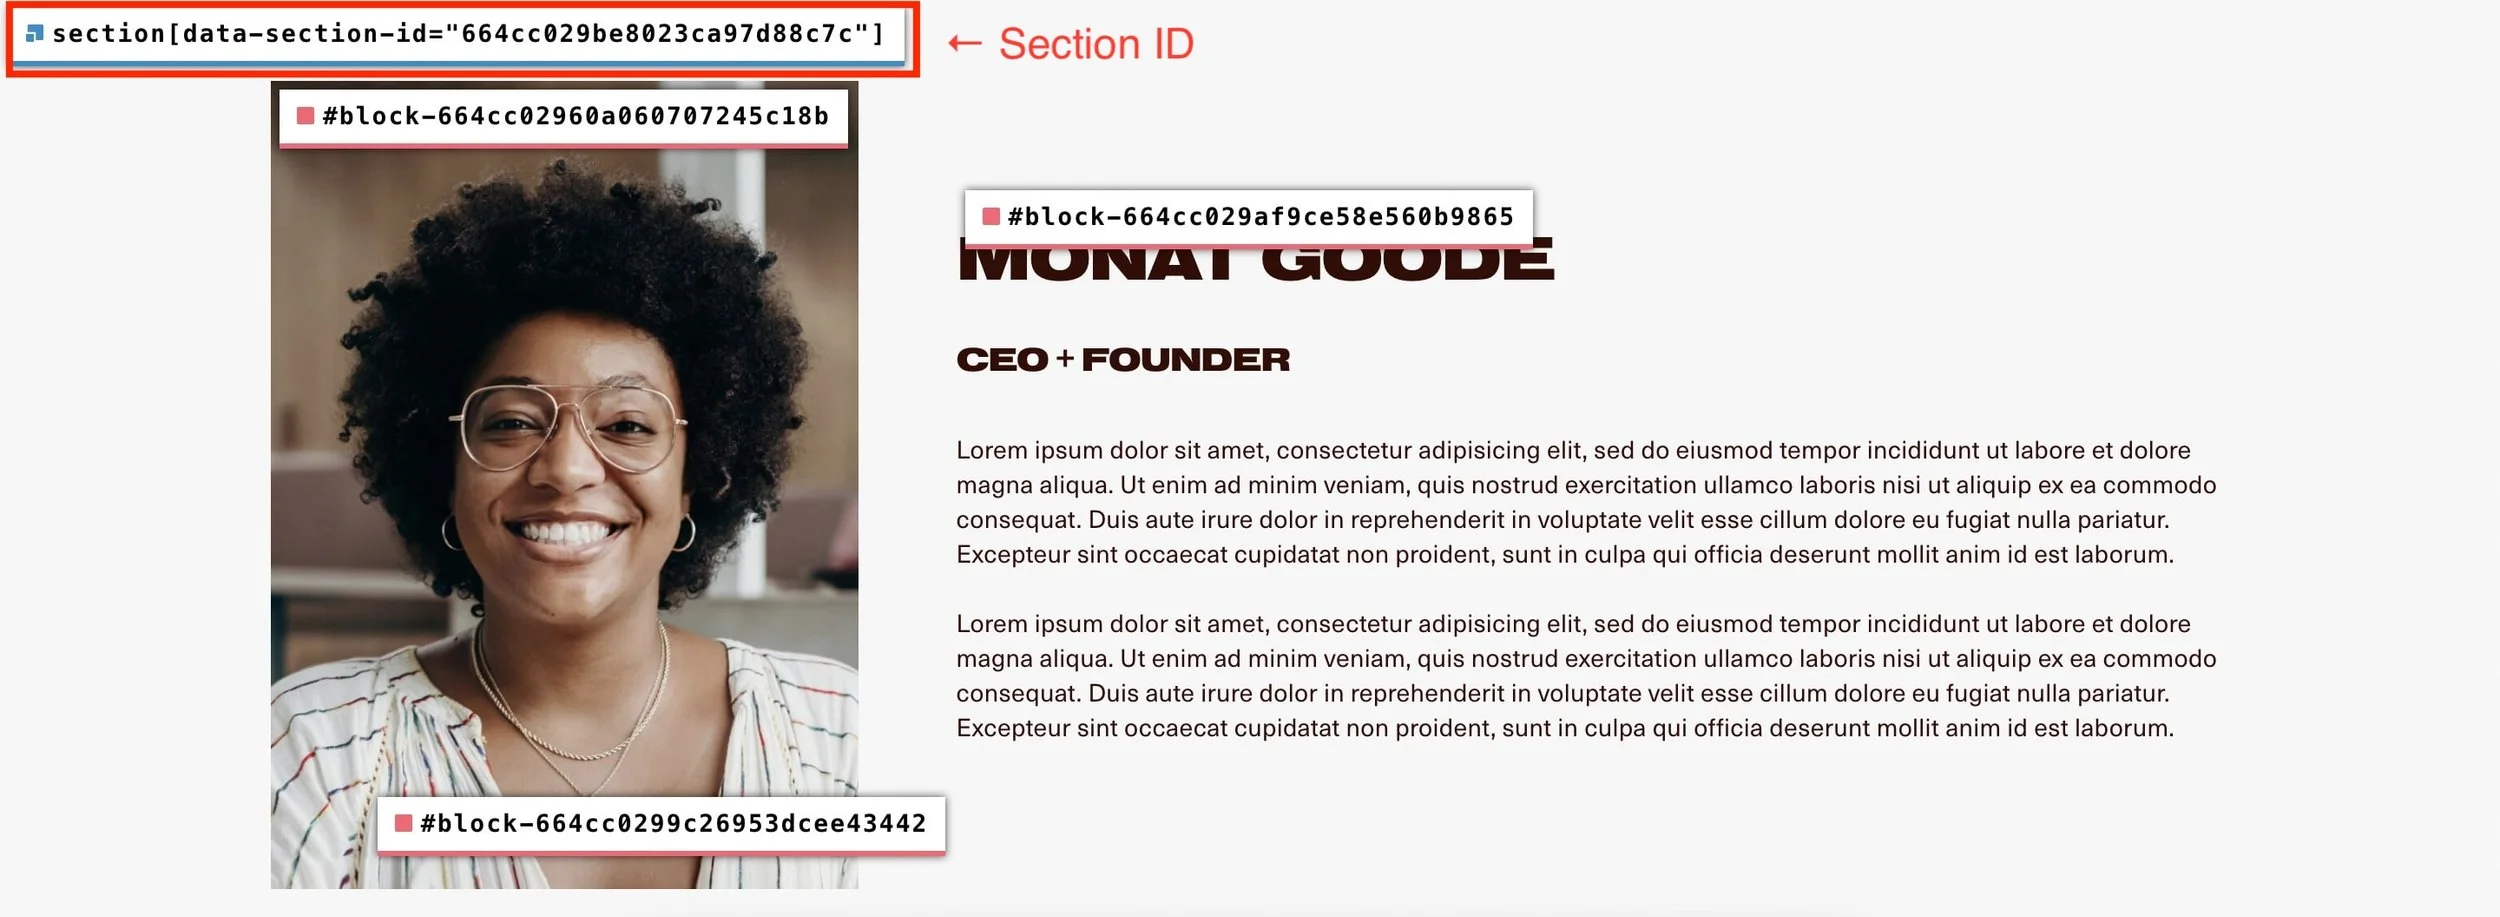
Once you install the Chrome extension, make sure to enable it in your browser. Then, when viewing your Squarespace site, you will see the section ID for each section on the page
The section ID will look like this: section[data-section-id="664cc029be8023ca97d88c7c"]. You can click to copy the section ID, however, we will only need the string of numbers from the section ID which in this example would be 664cc029be8023ca97d88c7c
4. Create Your Triggers
There are a few different “trigger” animations available with this plugin for hiding/showing the sections.
A regular expand/collapse like shown above
A Pop-up including the option to create a Sticky Close button which moves with the content
A Slide Down including an option to set the speed, and a fade down version
Each trigger option contains the word “Close”. This is what your button or link will say when the section is expanded. The user can click again to close the section. You can change this to say something else if you’d like (for example: Hide or Exit)
5. Add Your Triggers to Create Expandable Sections
This step is about putting it all together to actually enable your expandable sections:
Find the section ID of the section you’d like to hide (using step 3)
Create your trigger for this section (using step 4)
Add your trigger to a button or link in the section that will be staying visible
(make sure “Open link in new tab” is toggled OFF)

6. Insert Footer Code Injection
Upon purchase of the plugin, you’ll receive a link to an installation guide containing the footer code that you will need to copy and paste in your website
Click the Website tab from your website’s main menu, then Pages. Scroll down to Utilities and click Website Tools » Code Injection
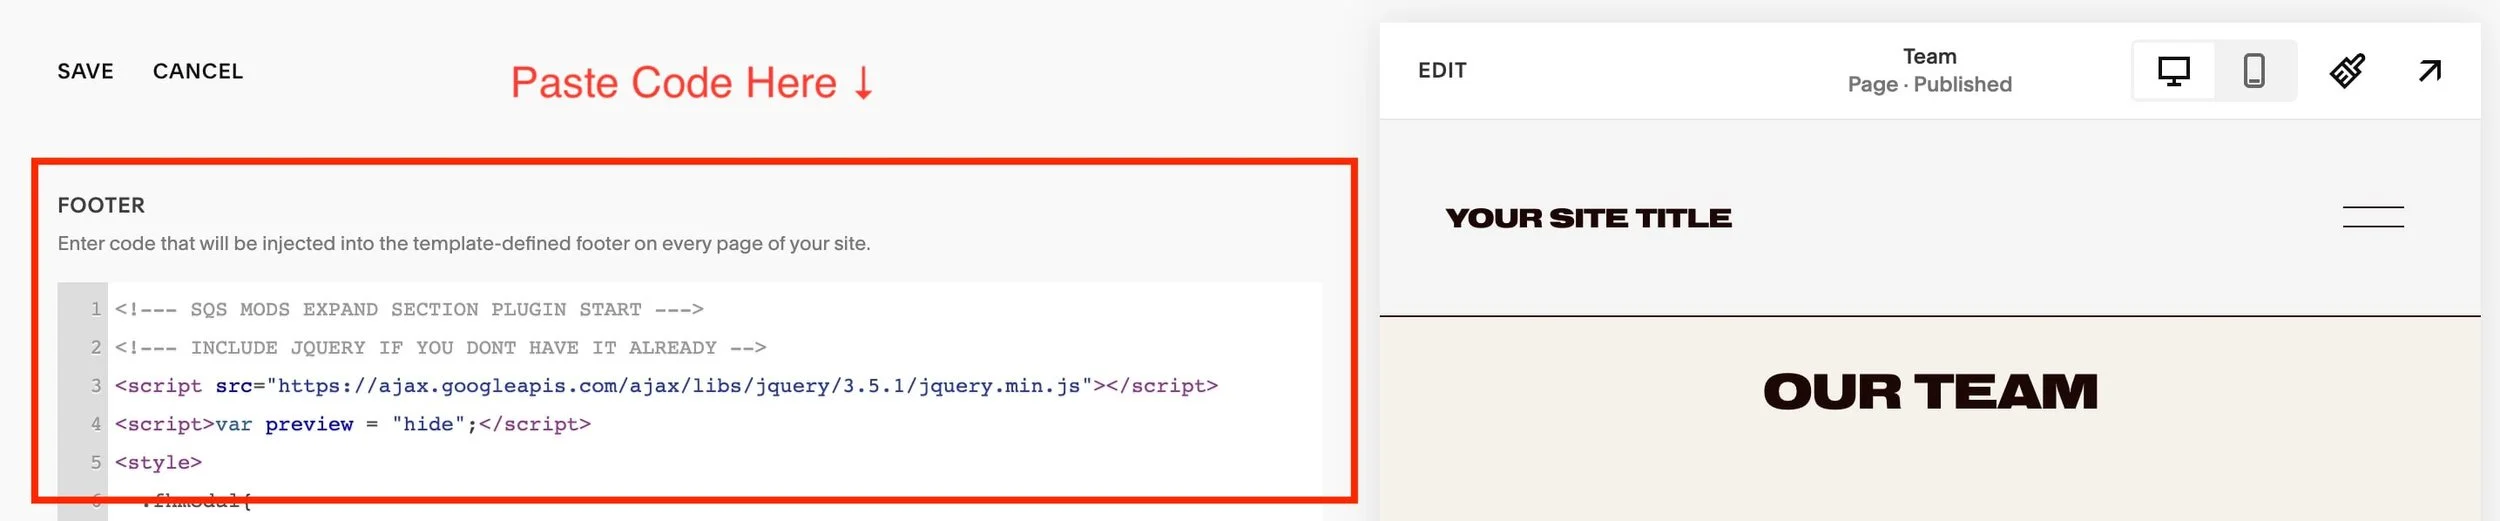
Under Code Injection, copy and paste the code from your installation guide into the FOOTER field
Make sure to choose to correct code for 7.0 vs 7.1 website. If you’re unsure about which version of Squarespace you’re using, scroll down to the bottom of the Pages panel and it will show your version
After you’ve pasted the correct code into the FOOTER field, make sure to click SAVE in the top left corner (NOTE: you will need to be on a Squarespace “Business” plan in order to add custom code to your website)
That’s it! Your expandable sections should now be fully functioning 🎉
Important Note: Your expandable sections will be hidden by default in the Squarespace editing dashboard. So if you need to make changes to them, you will need to temporarily tweak the footer injection code. Towards the top of the footer injection code, look for: preview = "hide". Change "hide" to "show" only while you are making changes to your hidden sections. Make sure to change back to hide when you are done making edits!
Check out your installation guide for some fun customizations at the end 😊
Did you enjoy this article? Check out more articles like this in the Squarespace Blog. In the blog, I share tips for hiring Squarespace Designers (or becoming one!), custom CSS and Javascript solutions, latest Squarespace news and updates, my favorite plugins, Squarespace Template Shops, and more!
Browse Premium Squarespace Templates
My modern, service-based templates are designed for entrepreneurs and small businesses who are looking for a professional website design without breaking the bank. Each one of my templates includes my 10-module launch course (which walks you through every single step of customizing the template) and my Bonus SEO Crash Course (which outlines the exact techniques I use to help my SEO clients land on Google page 1).

More from the Squarespace Design blog …
![50+ Best Premium Squarespace Template Shops [2025]](https://images.squarespace-cdn.com/content/v1/5fac4b921ca05f08cb315e40/1735848204800-I3GDILCDSSJO3EM3BVAW/Premium+Squarespace+Templates%2C+Squarespace+Templates%2C+Squarespace+Templates+For+Sale%2C+Best+Squarespace+Templates%2C+Custom+Squarespace+Templates%2C+Squarespace+Premium+Templates%2C+Squarespace+Website+Templates%2C+Squarespace+Custom+Templates.jpg)
![15+ Best Squarespace Plugins [2025]](https://images.squarespace-cdn.com/content/v1/5fac4b921ca05f08cb315e40/1694728480567-VI2YDT6NUD3M24LSQI9Z/Squarespace+Plugins%2C+Best+Squarespace+Plugins%2C+Squarespace+Design+Plugins%2C+Best+Squarespace+7.1+Plugins%2C+Squarespace+Animation+Plugins%2C+Squarespace+Commerce+Plugins+%2B+Squarespace+Plugins+7.1%2C+Squarespace+Plugins+For+Ecommerce%2C+Squarespace+7.1+Plugins.jpg)
![Cost To Hire An Expert Squarespace Web Designer [2025]](https://images.squarespace-cdn.com/content/v1/5fac4b921ca05f08cb315e40/1676998633226-ZZZ9ELM4Z5HOSV0F3RWI/Squarespace+Web+Designer+Pricing%2C+Squarespace+Designer+Pricing%2C+Squarespace+Web+Designer+Cost%2C+Squarespace+Designer+Cost%2C+Squarespace+Website+Designer+Cost%2C+How+Much+Do+Squarespace+Designers+Charge%2C+Squarespace+Website+Designer.jpeg)