
[10+ Design Secrets] for Quickly Building a Website on Squarespace
Squarespace has made massive improvements and updates over the years which has really helped to turn them into one of the largest, most intuitive website building platforms out there. Ease-of-use is one of their greatest features, and it’s why so many people are able to quickly get a website up and running, with minimal effort. Since Squarespace is an all-in-one platform, you won’t need to worry about making theme, software, and security updates manually, which is required in other website builders like Wordpress. This is already a huge timesaver in itself. Squarespace is also great for beginners because their interface is super minimalistic and streamlined. This helps users quickly navigate through the dashboard and find what they’re looking for whether it be the site styles, domain name connection, or the analytics dashboard.
However, even with Squarespace’s ease-of-use, there are still some tips and tricks I’d love to share to help make the building process even easier. I’ve complied a list of several Squarespace design hacks you should be aware of whether you’re a Squarespace Web Designer building for a client or a DIY enthusiast finally creating your small business site.
One of the biggest takeaways from this article will be: planning and preparing is key! I believe that planning and preparing truly helps you see your vision more clearly and avoids wasted time. This combined with some of the other tips discussed below will really help the design process go smoothly.
These 10 design secrets will get you building a website on Squarespace quicker and more efficiently than you could even imagine. You’re welcome 😉
*This post contains affiliate links. I earn a small commission when you click on the links and make a purchase. This comes at no additional cost to you. Affiliate links are marked with an asterisk.
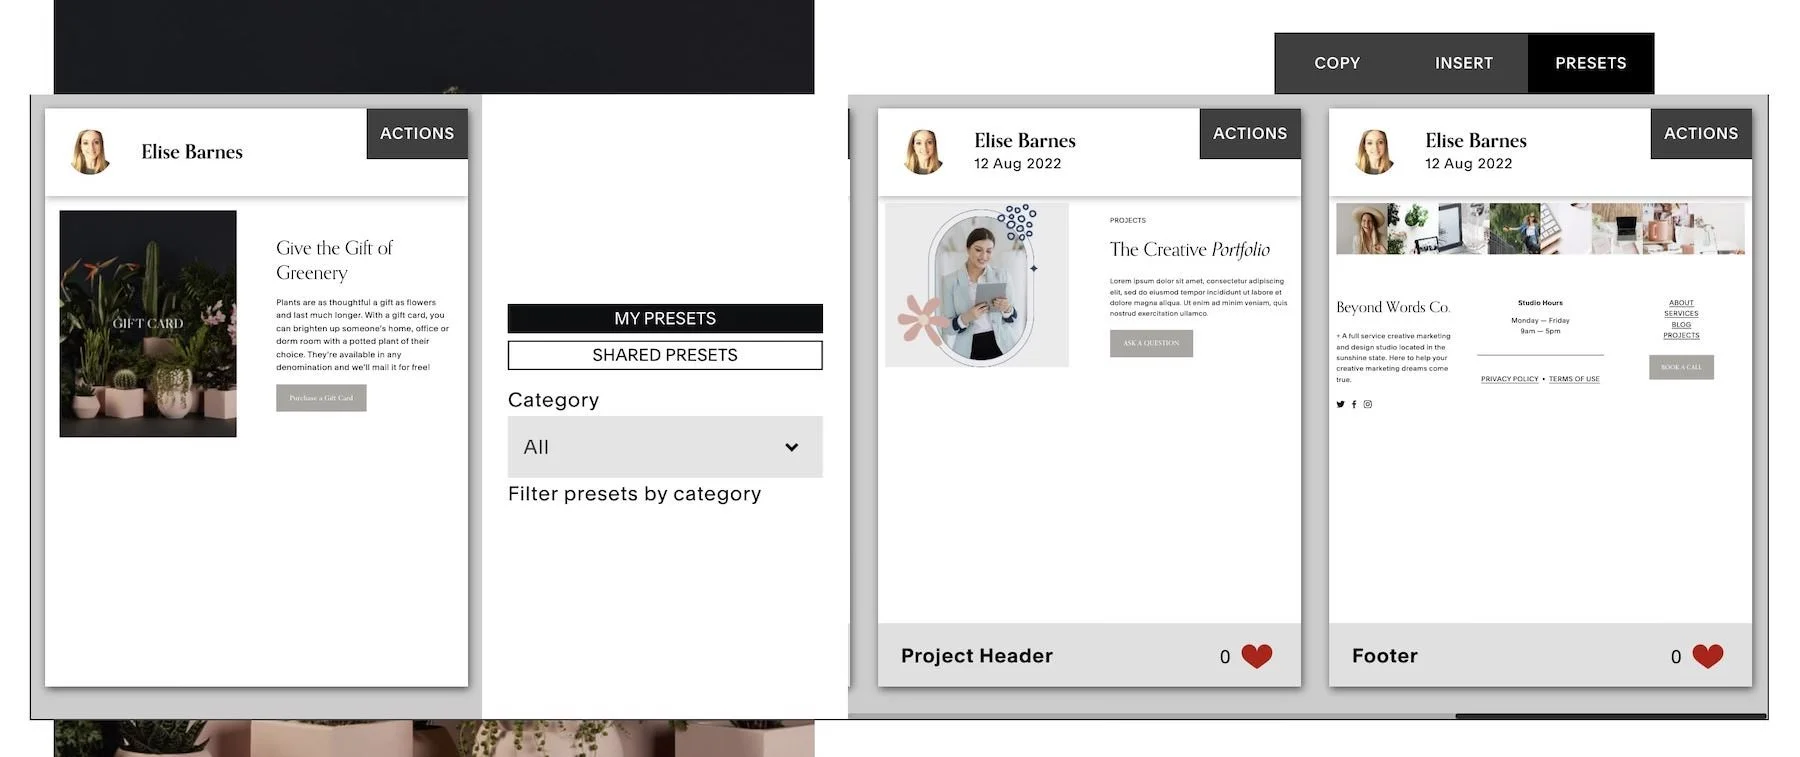
1. Use the SquareWebsites Pro Extension* for saving and reusing presets
Squarespace website pages are made up of several individual vertical stacking sections. In a well-built website design, each section serves it’s own purpose and conveys it’s own information to the user. For example, on a homepage of a website, you might have a section that contains a large background/hero image and some search engine optimized headline text, along with a strong call-to-action button. Then, your next section might be dedicated to summarizing the services you offer. Let’s say that you’ve spent some time creating the perfect layout to showcase your service offerings. The section contains a text headline, spacer blocks to nicely create 4 columns, each with their own image, text block for descriptive text, and call to-action-button. Of course adding and rearranging all of these different content blocks took some time. And you just realized that you’d love to be able to use the same exact layout on another website page, or even on another website. Well this extension allows you to easily do just that!
The SquareWebsites Pro Extension* allows you to save website sections as “presets” and then load that preset into another page or website in a matter of seconds. This feature has been a huge time saver in my web design business because I’m able to quickly replicate commonly used layouts and sections directly into new websites without the need to add all of the individual content blocks and rearrange them. I definitely recommend taking a look at the SquareWebsites Pro Extension for Chrome if saving and reusing preset sections is something you’re interested in.
2. Create one master template that you duplicate and start building upon for every new website
(Great for Squarespace Designers!)
In my Squarespace design business, I create several brand new websites from scratch every single month. And with each new website, I’ve found myself repeating the same tasks over and over again. These tasks include: selecting a template, deleting all of the demo content, setting site margins and spacing, setting the header layout and resizing the logo (which Squarespace has super tiny by default), and more…
One tip I’ve found super helpful is to create one master template with all of these tasks already complete. Then, each time I start a new website build, I simply use the Squarespace site duplication tool and completely duplicate that master template into a brand new website. Then, that brand new website already has that long list of starter tasks complete, so I can jump right into the design process. This has saved me so much time in getting started with a brand new website build for each client. If you’re a Squarespace designer or someone else who builds multiple websites a month, I would recommend giving this tip a try.
3. Choose fonts + colors and set up all of your site styles in the very beginning
Before I start actually building a website on Squarespace, I like to select all of the fonts and colors that I’ll be using to design the site. My web design clients know that before we begin a project, I’ll send them over a questionnaire that asks them a bunch of design related questions. Those questions include what fonts and colors they are hoping to see on their new website (if they have an idea). Many do have an idea of what fonts and colors they might like to use. So this gives me a good starting point in the selection process for fonts and colors. Additionally, I’ll do some research into their specific industry and see what the best colors are for peaking their target audience’s interest.
Once I decide on the fonts and colors for the website, I’ll go into the site styles and set the color palette, font families, font sizing, letter spacing, and button styles. Sometimes I’ll make tweaks to these styles as I start designing the actual website. But by having this data pre-loaded before I start the actual website build, I’ve realized that I’ve saved a ton of time that I would have spent fiddling around with different fonts and colors while trying to build out pages.
4. Choose a template based on your business
Squarespace has about 110 templates in their template library* that you can choose from. With a number like that, it may sound like an overwhelming decision to select the template that’s best for you. But the helpful part is you can actually filter and sort by category/industry. So let’s say you’re a restaurant owner looking for a template to display your menu, large food images, restaurant hours, etc… You don’t need to waste your time looking at eCommerce templates or templates that are designed for photographers or musicians. Simply filter the library to view only restaurant related templates and easily select the best match for you. This will even save you some time in the design process because the template will already be built with a user-friendly layout and design that’s been proven to work well in the restaurant industry.
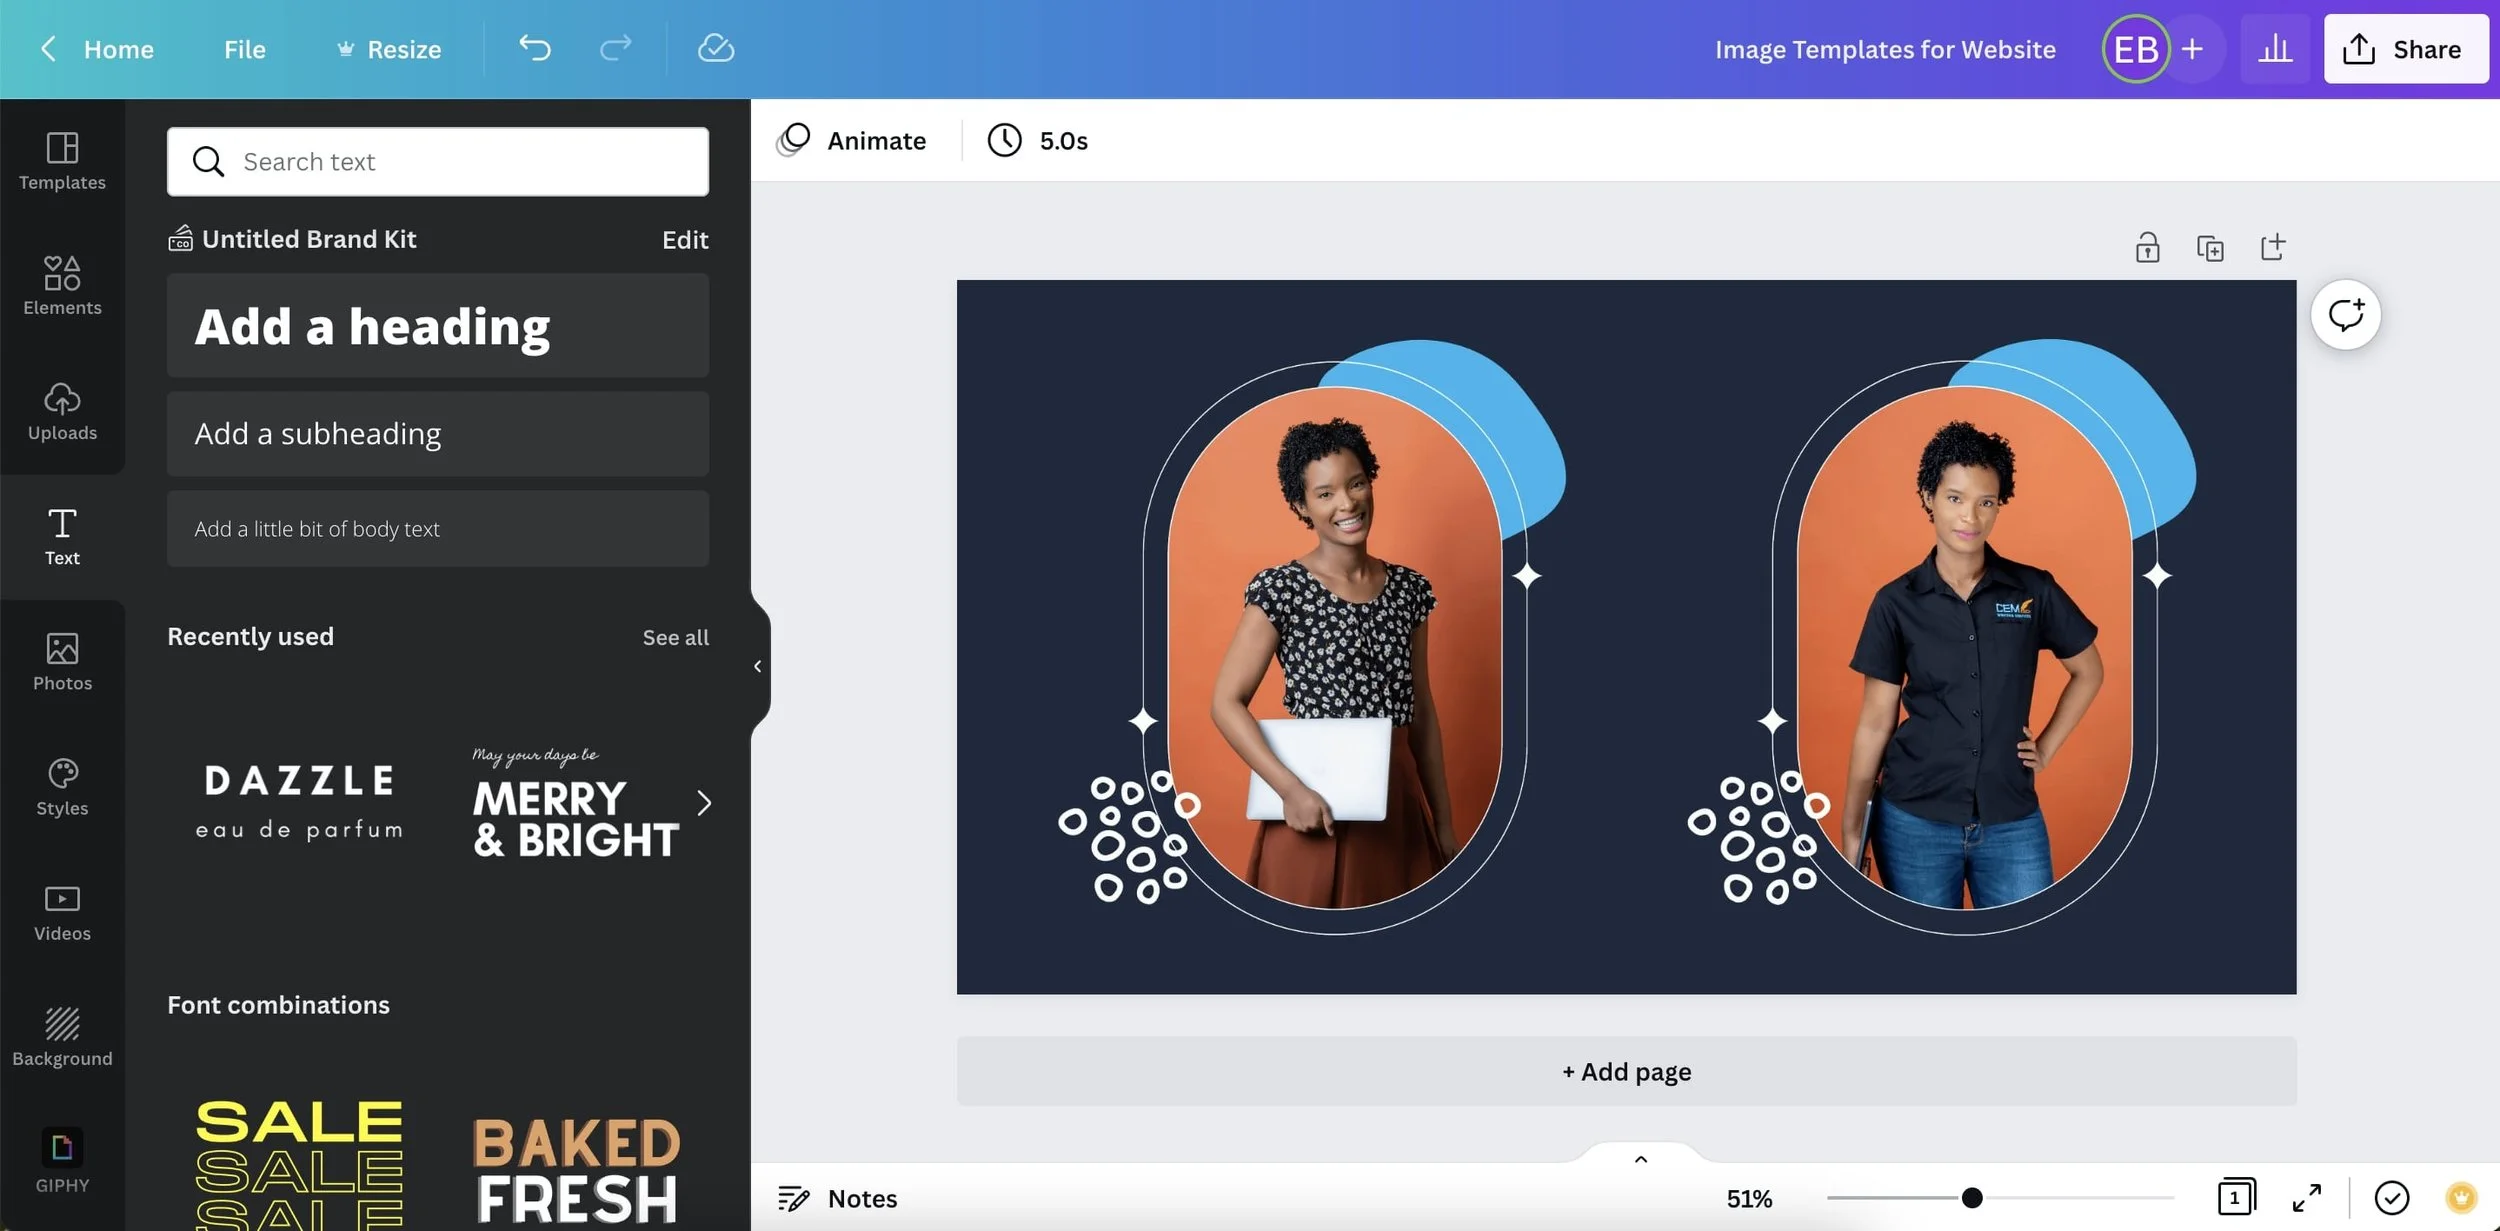
5. Use Canva* to create custom graphics
One of the things that will really slow you down when building your website will be thinking of design ideas and trying to make it look unique. If I’m feeling like I’m in a bit of a design rut, I’ll typically turn to Canva* for some inspiration. Creating custom graphics on Canva reaaaaally helps to elevate your website design. They have an endless amount of graphic templates to choose from. And basically all you need to do is change the colors, upload your own images, and download. Then, once you create one graphic, you can just change the images and small design elements if you’d like and use it in multiples places throughout your website. Check out my example below for further clarification.
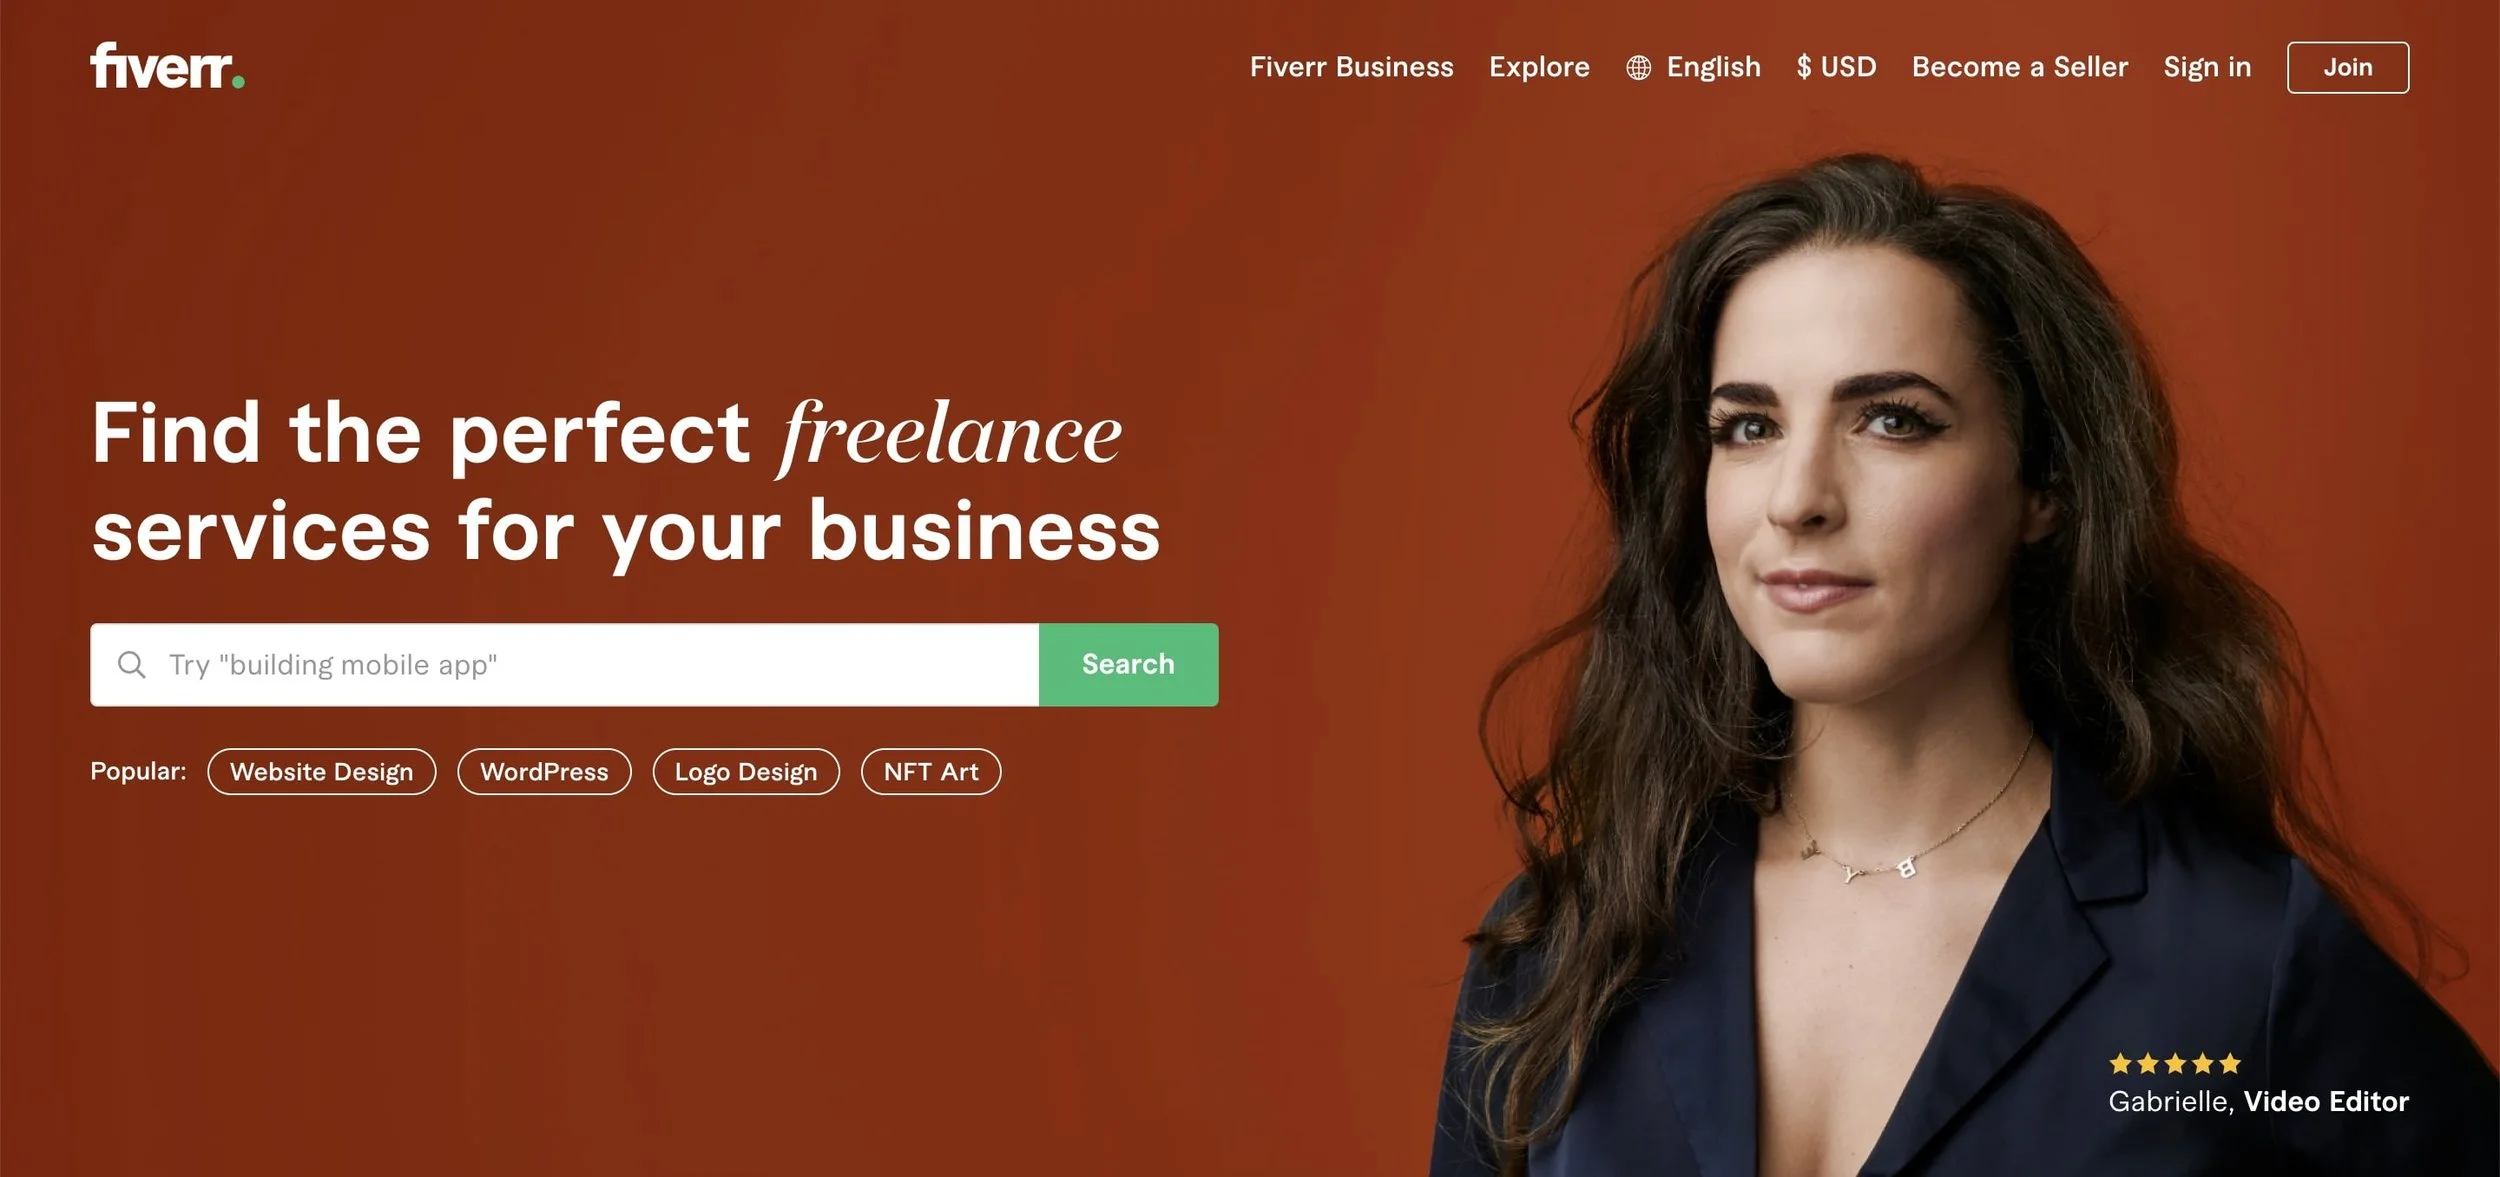
6. Plan out and write all of your copy first (or hire a freelance copywriter*)
Writing and planning out your website copy before hand can really help you save time during the actual build. I recommend either writing your own copy or hiring a freelancer on Fiverr*. Of course hiring a freelancer on Fiverr will save you LOADS of time. Plus, these guys are actually pretty affordable and do great work.
If you choose to write your own copy, I would recommend writing out all of your content in a Google Doc before you start designing. Then, during the building process, you’ll be able to better envision the layout needed for each website page.
7. Compress and rename your images with keywords for SEO first
Images for Squarespace websites should generally be 500KB or less in size. Large background images should be 2500 pixels wide, while all other inline images can be 1500 pixels wide. Additionally, if you’re not naming your image filenames with keywords, you’re missing out on a huge SEO opportunity. Check out this amazing Squarespace SEO course* that teaches you how to do keyword research, optimize images for SEO, and grow your traffic on Google.
Resizing and renaming images can be some pretty timely work. I definitely recommend creating a folder on your desktop, gathering all of your images and resizing, compressing, and renaming them all BEFORE you start the design process. Trust me, when you’re in the middle of a full-on website design, feeling super inspired to keep creating, the last thing you want to do is fiddle around with image sizes and filenames. If you do all of this beforehand, it’ll feel like a huge time saver during the actual design process.
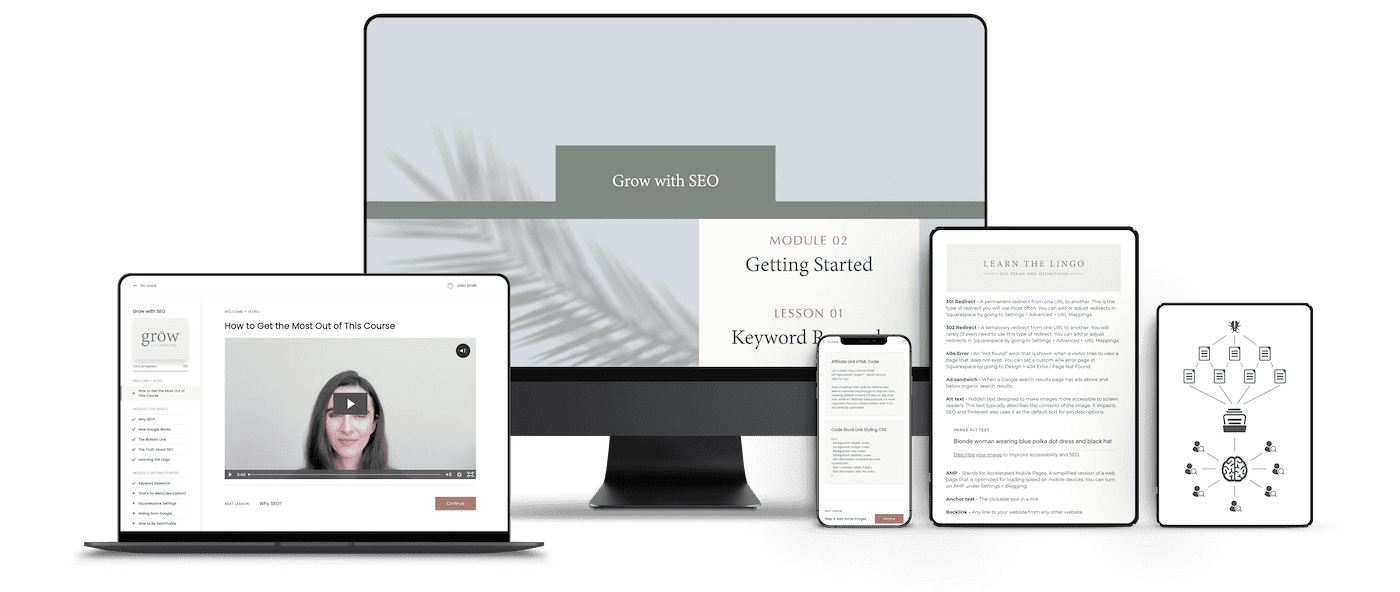
Squarespace SEO Course by Kate Scott
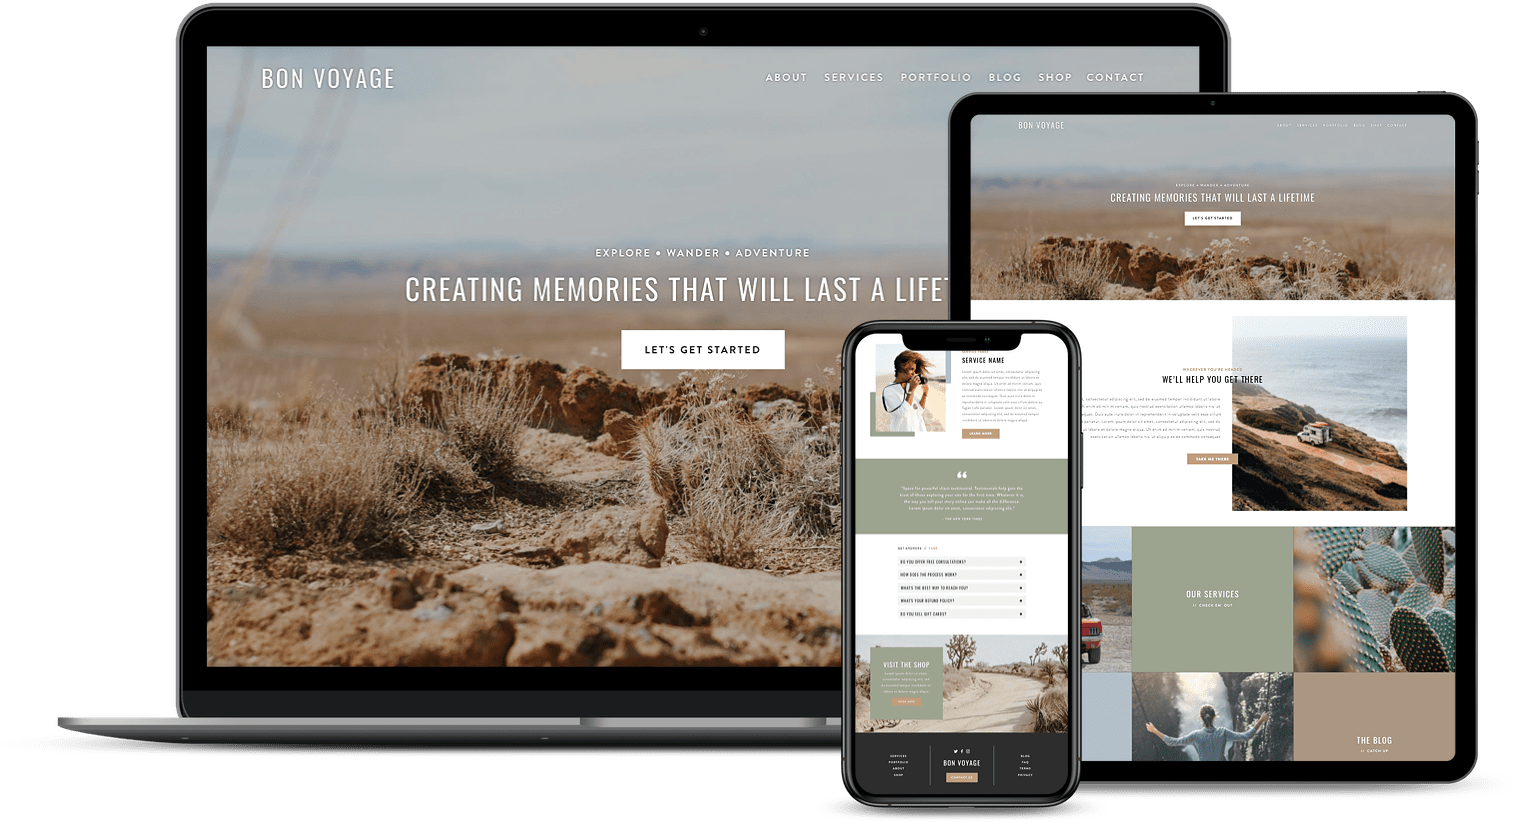
8. Duplicate pages and repurpose the layout and design for other website pages
Squarespace has a handy little feature that allows you to duplicate an entire website page. Just click on the little settings gear icon next to any website page in your Squarespace dashboard, scroll down and click “duplicate page”, click confirm, and then the newly duplicated page is added to your “not linked” section.
In the example below, I have 2 website pages that I recently built for a client. They are both “service” pages outlining the 2 different services she offers. The first page I fully designed and built from scratch. And then for the second page, I simply duplicated the first page, changed up the colors, rearranged the sections, replaced text and image content, and boom 💥 — I had another fully designed and built website page in less than half the time it took me to create the first page. Duplicating website pages is seriously such a huge timesaver in Squarespace web design. I highly recommend giving it a try!
Original page vs. duplicated page ↓


9. Make use of Squarespace Plugins
Sometimes we spend wayyyy too much time trying to create a custom feature or certain layout for a website. Usually a quick Google search will turn up with a plugin that’s built for exactly what you’re looking to do.
For example, a few months ago I worked with a client building a brand new website on Squarespace. She had an existing Squarespace website with tons of blog posts that she wanted to transfer over to the new website. I did the classic import/export for blog posts in the Squarespace dashboard but alas, none of the images transferred over! I probably spent 5 hours individually uploading all of her images to the new blog.
Then a few weeks later, I learned about this Squarespace plugin (called the SquarespaceWebsites Tools Extension PRO*). It automatically transfers over all blog posts (and their images, data, etc…) over from one Squarespace website to another in minutes 😲! I could have saved myself almost a full day of a super tedious task. Honestly my bad for not knowing about this plugin sooner… rookie move for sure. Needless to say I will forever be using this plugin for transferring blogs, pages, styles, and more between Squarespace sites. Here’s a list of some more plugins I’ve found super helpful for Squarespace websites.
10. Just launch it already!
If you’re a perfectionist like me — let’s face it — the website’s never going to “done”. There’s always going to be something you want to change or a new idea that’s going to pop into your head that’s going to make you want to scrap it all and start from scratch. This will drive you absolutely crazy, trust me. A piece of advice — just put your best foot forward, launch the damn thing, and move on to focus on other aspects of your business 😀
11. Work with a Squarespace Designer
If you’re not the DIY type or you simply just don’t have the time to figure out how to design a website, then I think it’s time to hand it over to the professionals. There’s lots of Squarespace web designers to choose from. Yes, I am one of them! I offer a fully designed, SEO optimized, and ready to launch website in just 2 weeks! Reach out if you’d like to learn more ⭐
Did you enjoy these Squarespace design hacks? If so, check out even more Squarespace design + SEO tips and tricks plus custom CSS and code solutions in the blog.
Browse Premium Squarespace Templates
My modern, service-based templates are designed for entrepreneurs and small businesses who are looking for a professional website design without breaking the bank. Each one of my templates include video tutorials for easy content upload / style tweaks. I also include my Advanced SEO Guide (a $500 value). This guide contains the exact techniques I use to help my SEO clients land on Google page 1.
More from the Squarespace Design blog …
![50+ Best Premium Squarespace Template Shops [2025]](https://images.squarespace-cdn.com/content/v1/5fac4b921ca05f08cb315e40/1735848204800-I3GDILCDSSJO3EM3BVAW/Premium+Squarespace+Templates%2C+Squarespace+Templates%2C+Squarespace+Templates+For+Sale%2C+Best+Squarespace+Templates%2C+Custom+Squarespace+Templates%2C+Squarespace+Premium+Templates%2C+Squarespace+Website+Templates%2C+Squarespace+Custom+Templates.jpg)
![15+ Best Squarespace Plugins [2025]](https://images.squarespace-cdn.com/content/v1/5fac4b921ca05f08cb315e40/1694728480567-VI2YDT6NUD3M24LSQI9Z/Squarespace+Plugins%2C+Best+Squarespace+Plugins%2C+Squarespace+Design+Plugins%2C+Best+Squarespace+7.1+Plugins%2C+Squarespace+Animation+Plugins%2C+Squarespace+Commerce+Plugins+%2B+Squarespace+Plugins+7.1%2C+Squarespace+Plugins+For+Ecommerce%2C+Squarespace+7.1+Plugins.jpg)
![Cost To Hire An Expert Squarespace Web Designer [2025]](https://images.squarespace-cdn.com/content/v1/5fac4b921ca05f08cb315e40/1676998633226-ZZZ9ELM4Z5HOSV0F3RWI/Squarespace+Web+Designer+Pricing%2C+Squarespace+Designer+Pricing%2C+Squarespace+Web+Designer+Cost%2C+Squarespace+Designer+Cost%2C+Squarespace+Website+Designer+Cost%2C+How+Much+Do+Squarespace+Designers+Charge%2C+Squarespace+Website+Designer.jpeg)